Wednesday, November 12, 2014

Crisp Apple Crumble - Tailor Made For Everyone!

Apple Crumble

Look at me, am excited about a crumble! I hope you don't remember exactly how many times I have declared that you may never see a crumble or crisp here. What's not to like in these desserts you may wonder. For one, I don't quite like the texture or sweet-sour taste of overcooked fruit. And then the crumble bit. Is it as crisp as it is meant to be? Crumble veterans will want to throttle me for over-dramatizing, I just may just not have got it right so far. Hope you will still humor me?


If a crumble is new to you, its typically fresh fruit like apples, pears, berries and the kind tossed in sugar, butter, vanilla etc, piled into a baking dish. On top of this filling goes the crumble topping - mostly flour, chilled or melted butter and sugar made along the lines of a pie crust. The crumble is then baked till the fruit is all bubbly and the top is golden and crisp. Apparently works great for many, but then you know there are folks like me as well!


Tempted by pumpkins, apples and warm spices, contemplating another go at a crumble, I came across this recipe. The fruit and the topping are cooked separately, then put together later. The answer sometimes is very obvious, but it takes a Raymond Blanc to hold it to your face. Am so glad!

While this may not be the conventional way of making a crumble, you will find it perfect to make for people with varied tastes. Just the right amount of fruit you want, cooked just right. The topping baked until nice and crisp, just the right amount of it sitting on the warm fruit. Top it with ice cream or whipped cream and you have your crumble, just the way you want it. And your spouse, kids, neighbors and guests can have it just the way, they want it! 


Apple Walnut Crumble - Based on this recipe from BBC Good Food - Serves 6

Ingredients: 

For the crumble topping 

Flour - 120 grams 
Vanilla sugar - 60 grams ( I process the sugar)
Unsalted butter, cubed and then chilled - 60 grams
Vanilla bean - 1 
Cinnamon - 1/2 teaspoon (optional)
Walnuts, toasted and chopped coarsely - 2-3 tablespoons

For the apple filling. This is just a rough guide, please go by your taste and preference. 

400 grams peeled and cored apples ( I used Red Delicious)
Brown sugar - 3 tablespoons
Unsalted butter - 2 tablespoons
Cinnamon - 1/2 teaspoon
Water - 2-3 tablespoons (or water plus rum or orange juice) 
Vanilla - 1/2 bean scraped
1/2 teaspoon cornflour

Vanilla ice cream or softly whipped cinnamon cream to serve


  • To make the topping : Sift the flour and sugar. Rub the vanilla caviar into this. Cut the chilled butter into the flour mixture till it resembles bread crumbs. It will seem dryish, but do not add any liquid. 
  • Be sure you cut in the butter well enough so that there isn't any dry flour visible in the mixture.  I like doing this on my kitchen counter, using my metal dough scraper. You may find a food processor handy here. 
  • Do not over work the dough or the topping will be heavy. Refrigerate it covered for an hour or more.
  • Pre-heat oven to 190 C / 375 F. Line a 9'' square or bigger tray with parchment. Transfer half the chilled mixture to the tray. Press it down very gently, spreading it in an even layer. 
  • Bake for 10-15 minutes, making sure you flip the mixture once after 8-10 minutes. The baking time will depend on the thickness of the layer, be careful not to burn. The top may look light in color, but the bottom layer would be almost baked. You want this to be crisp and golden when done. Once cool, the topping will crisp up.
  • The mixture will break when you flip, that's fine. Carefully bake a minute or two more if needed. Cool, break up the topping as you like it, I like largish bits. Stir in the walnuts, store airtight till needed. 

For the filling : If baking this for the first time, you may want to cook a tiny portion of the apples first to test what you like best. 

Take all the ingredients in a heavy bottomed saucepan. Over low heat, cook covered for 2-3 minutes or till the apples are soft but not mushy. Remember, it will cook some more even off the heat. And then that will be the texture you will have in your dessert (unless you plan to bake it again with the topping) 

Assemble: Spoon some warm apple filling (with the juices) into ramekins. Top with as much crumble as you like ( I like lots, like half and half!), scoop some ice cream over it. Serve immediately. 

Apple Crumble


Please note : If you add berries like in the original recipe, you may not want to add more liquid like water or juice as there would be enough released from the fruit. The cornflour is to thicken the juices slightly. 

The recipe directs to bake the assembled crumble again to re-warm the dessert, but I found that unnecessary. If you will be baking the assembled crumble gain, the fruit will cook further. You can see me warning you not to do it 

If you have baked the crumble topping much ahead, check once before serving. You may need to bake again briefly if the crunch is lost. Blamed on frequent tasting and letting in some winter air into the container. 

Think wicked ahead. It may not be a bad idea to bake the topping and stash it in the freezer for dessert emergencies. Briefly bake to restore crunch if needed. We have a long winter ahead, just being prepared.

So, the way I made it sacrifices the visual appeal and charm of the fruit juices spilling over the sides. But I think I will live with it. This, for now at least, will be the only way a crumble will be made in my kitchen. You could try this with your favorite topping recipe, but do share it with me!

Syrupy warm fruit with texture, lots of light crisp topping, vanilla ice cream melting over it. Think I like it!

Tuesday, November 4, 2014

Kiwi Quark Mousse - With Zespri Kiwifruit!


Kiwi Quark Mousse

Kiwifruit aka Chinese gooseberry.  Familiar, but not quite.  But fascinating it has always been!  The egg shaped, far from attractive fuzzy exterior, reveals a pretty seed flecked interior in an intriguing shade of green.  And now a gorgeous yellow too I discover, thanks to this event by Zespri International at ITC Gardenia last month.  I know this post comes late, blame it on the festive season, the inevitable sweets and savories galore.  And then some!

At ITC Gardenia, Chef Yogen Datta and team demonstrated a few recipes to showcase the versatility of the fruit which can be used in everyday dishes as well as exotic ones.  Kiwi Cheesecake, Carpaccio of Kiwi with Silken Tofu,  Rucola, Kiwi & Rosemary Salsa,  Sushi with a Kiwi twist,  Kiwi Caprioska and Kiwi Sangria were among those demonstrated to us. 


Zespri International is owned by over 2,500 kiwifruit growers of New Zealand.  They claim that the fruit they grow comes with the highest assurance of quality.  Along with the conventionally grown fruit, they also sell organic kiwifruit, both green and yellow.  The fruit always comes with a Zespri sticker, so be sure your fruit has it if you are looking for those grown by them. 

Zespri Green Kiwifruit  are tart-sweet, sweeter when ripe.  The yellow ones, Sun Gold Kiwifruit are sweeter with a tropical flavor.  The green ones sometimes may need to be stored for sometime before they are ripe enough, whereas the yellow ones are always ready to eat. 


Choosing and storingLook for plump fruit with a smooth skin and no bruises.  If you are looking for ripe ones, choose those which yield to gentle pressure.  Those not ripe yet can be left on the counter for a couple of days to ripen.  If you want to hasten the ripening process, put the kiwi in a paper bag with a banana or apple. When it is ripe enough and you  don't want it to ripen further, store in the refrigerator for 1-2 weeks.  I gather, the fruit is enjoy best chilled and is ripe enough, but not mushy! Mushy ones can probably be used in smoothies.

To eat the ripe fruit, just cut it into half, scoop the flesh out and dig in!  The flesh of the Kiwi fruit is very soft and you could cook it into mush in a matter of seconds.  I prefer to eat it as is or as a topping or in a salad or just pureed to use in a dessert.  

Nutrition : Nutrition dense kiwi fruit is supposed to be very rich in calcium,  potassium and fiber.  It has a very low glycemic index too, perfect for the health conscious!

Here is what I made with the fruit.  As I mentioned earlier, the kiwis got my attention a bit late! A simple yet refreshing Quark Mousse topped with Kiwi Fruit.  I have been dreaming of this as a filling in my cake since the time I made this mousse. 

Kiwi Quark Mousse


Kiwi Quark Mousse : Inspired By Deeba Rajpal. 
Serves 6.

Ingredients: 

Homemade Quark, well drained : 1 Cup
Whipping cream - 1 cup to get 2 cups whipped cream ( I have used sweetened non-dairy)
Sugar - 2 tablespoons or more to taste (read note)
Pure Vanilla extract : 1 teaspoon
Kiwi fruit puree - 1/2 cup
Sliced Kiwis and fresh mint for garnish.

Method : Whisk together the quark, sugar, vanilla and kiwi fruit puree.  Whip the cream to soft peaks.  Gently, fold it into the quark.  Spoon into dessert glasses. Cover with cling film and chill for 4-5 hours.  Garnish with fresh kiwi slices and fresh mint leaves just before serving. 

Please note : If using unsweetened cream, add more sugar as needed.  You may also need to stabilize the mousse with agar agar or gelatin. In the picture above is with Amul cream which did not hold up very well. It works very well with non-dairy cream though. 

Add a touch of wholesome green or yellow to perk up your salad or dessert with some kiwifruit for a change!  For more information on Zespri Kiwifruit, please do check their website.


Tuesday, October 28, 2014

Lemon Poppy Seed Thins


Lemon and lime. They just aren't the same.  Or are they? Never gave it much thought really! Thick skin, thin skin, yellow and green, tart, sweeter, small and big.  Most of us here are more familiar with the small, thin skinned ones.  Lemon, oops, lime rice, lime juice, lime pickle are so much part of our culinary culture.  I am just opening my eyes to lemon and lemon based desserts.  When the sister visited in July, I pestered her to carry some lemons for me across the seas. Lemons of all things !? Well ! The exasperated busy doctor made a last minute trip to the supermarket to get them as fresh as she could get for me. 


Aromatic and bright hued, they looked gorgeous indeed! Wish they were as commonplace here as well. Snugly wrapped in cling film, they sat in the fridge much longer than I meant them to. Worried they might lose their charm, I hastened to make some Lemon Thins from my favorite cookie book Chewy Gooey Crispy Crunchy Cookies.  In contrast to the much smaller thin skinned ones we get here, the lemons gave their zest and juice so generously! Times when I wish I had more than just a passing interest in gardening!


These cookies, Medrich claims, are more lemony than most. The recipe is from her friend Maya Klein, hence the name Maya's Lemon Thins. She reduces the lemon juice, concentrating the flavor, thereby producing buttery, tender-crisp thin cookies with a pleasant lemony taste. If you love all things lime and lemon, you must give these a try! I made these with lime as well and they taste just as good, but be sure you use the freshest and best you can find.

Ingredients : To make sixty-four 2 1/2 inch cookies.  

Freshly squeezed lemon / lime juice - 60 ml / 1/4 cup 
Unsalted butter, soft and cut into pieces - 170 grams / 1.5 sticks / 12 tablespoons
All purpose flour - 315 grams / 11.25 ounces
Baking soda - 1/4 teaspoon
Egg whole - one / 48 grams 
Egg yolk - one / 18 grams 
Vanilla Sugar - 200 grams / 1 cup ( I use powdered)
Freshly grated lemon zest - 1 tablespoon plus one teaspoon
Salt - 1/4 teaspoon

Method : Mise en place. 

Whisk together the flour and baking soda. Set aside.

In a heavy sauce pan, heat the lemon juice on medium heat till it becomes thick and syrupy and reduces to 1 tablespoon. This will take hardly anytime, so stick around. Measure it sooner than later, you can always put it back on heat to reduce further if needed. Turn off the heat. 

Add the butter, stir till it melts. I have cooled this and then whisked in the zest. 

In a medium sized bowl, whisk together the egg, egg yolk and sugar till homogeneous. Whisk in the butter mixture.  I find my tiny whisk very handy here.

Tip in the flour. Using  a spatula, stir until just incorporated. The dough will be very very soft. Wrap it in clingfilm and refrigerate at least 20 minutes. Once you refrigerate the dough, you can store it for up to 2 days. The dough will firm up. You want it firm enough to roll out easily without it being too hard. If you refrigerate longer, keep portions of the dough out at room temperature till it is fairly firm, but soft enough to roll easily. 

(After the first 20 minutes of chilling, Alice directs to divide the dough into 4 portions, roll each piece 1/16 inch thick between 2 sheets of plastic or wax paper. Slide a cookie sheet under each plastic sheet, refrigerate till firm, cut and bake) Since I found the dough too tender to to do this,  I have divided the dough into smaller portions and rolled out the chilled dough.

Line 2 cookie sheets with parchment. 

Take out one small portion of the dough from the fridge. Lightly dust your counter. Carefully, roll the dough thin, about 2 mm.  Cut the cookies with a 2 1/2 inch cookie cutter. Transfer the cut outs to one sheet, chill briefly (about 20 minutes) and then bake them on another lined sheet. I find my large and small metal dough scrapers very useful for lifting the rolled dough and transferring the cookies to the sheet. 

Re-roll scraps.  When ready to bake, pre-heat oven to 200 C / 400 F. Carefully transfer the cookies to the lined sheet, spacing them 1 inch apart. Bake for about 6-7 minutes or till golden around the edges. Watch carefully as they burn quickly. A test batch will tell you the exact baking time. Cookies crisp up as they cool. 

Can store the cookies air-tight for at least  a week. The dough freezes well Alice says, which is an added bonus. 


Variations

Lemon Poppy Seed Thins : Add 1/4 cup of poppy seeds to the flour mixture.

Lemon Ginger Thins - Omit the lemon juice and the boiling step. Melt the butter and add 2 tablespoons finely grated ginger. Mix one teaspoon ground ginger with the flour and baking soda. Proceed as directed.

Dainty, crisp and lemony, don't you want these in your cookie jar?

Friday, October 17, 2014

Carrot Halwa / Gajar Ka Halwa

carrot halwa, gajar ka halwa

Carrot Halwa. One of Inida's most adored traditional desserts despite being fairly ubiquitous. An easy and versatile dessert made practically in every home and restaurant. Effortlessly goes from homey to rich and richer to suit individual preferences. But hardly ever fails to please! Not surprisingly, even mothers in our Bollywood movies make Gajar Ka Halwa so often. Its a favorite comfort dessert during winter, a convenient make ahead sweet dish for guests. Grated carrots slowly cooked in milk, sugar and ghee, garnished liberally with nuts, fragrant with cardamom and saffron. What's not to love?  

Carrot halwa is one of those 'safe' desserts which requires very little by way of technique nor needs you to spend a great deal of time. So even if you are a reluctant cook, you can easily win a thumbs up for your first attempt at it. Unless of course you burn it while you are busy WhatsApping or Instagramming about the halwa during its last few minutes on the stove! With the festival of lights around the corner, how about trying this simple dessert if you haven't  tried your hand at it yet? I like it less rich, not very sweet. If you do not approve, tweak it every possible way and we will still remain friends. 


So what we do is cook the carrots in a lot of milk till it is reduced and absorbed quite a bit to make a creamy halwa. You could cook the carrots in a pressure cooker or microwave but then it would not taste quite the same. If you ask me that is.

Carrot Halwa 

Ingredients - To make about 6 servings, half cup each

Grated carrots - 4 cups ( 1/2 kg approximately)
Ghee - 4 tablespoons or more as desired (divided use)
Cashew nuts - 1/4 cup, broken or halved
Whole milk (3.5%) - 4 cups / 1 liter (no low fat please!) 
Sugar - 6-7 tablespoons 
Saffron - a generous pinch
Crushed cardamom - 1/2 teaspoon

Method : Peel and wash the carrots. Grate them using a grater with medium sized holes, measure. Soak the saffron in a teaspoon of warm milk. Set aside.

Heat 2 tablespoons ghee in a heavy bottomed pan. Fry the cashew nuts till golden, drain and keep aside. Add the carrots to the remaining ghee and saute for a couple of minutes on low heat. 

Add the milk and cook on medium heat. Stir occasionally. The carrots will soften and cook as the milk reduces slowly. Keep scraping back the milk solids which accumulate at the sides of the pan back into the halwa. This will give it more richness.

Cook about 20 minutes. When there is still about 1/4 cup of milk left, add the sugar. Start with 6 tablespoons, add more if needed. The mixture will turn more liquid. Continue to cook, stirring often till you don't see any more thin milk at the bottom of the pan. About 10-15 minutes. It will be homogeneous and will come together in a nice mass. You can either let it remain slightly pudding like or let the moisture evaporate some more. In the pictures here, the moisture has been absorbed quite a bit. No I wasn't Instagramming,  just another variation I did not quite relish. I like my halwa very moist and creamy.  

Stir in the soaked saffron, nuts, ghee and cardamom. Cook for a couple of minutes, turn off the heat. Best eaten warm.

Carrot halwa, gajar ka halwa

Time to bring out the diyas, the fairy lights and candles.  Isn't it sheer joy just to behold the beauty of something as simple as light? Hope this Diwali brings you a lot of happiness, have a happy and safe one!

Thursday, October 9, 2014

Pioneer Woman's Easy Pizza Crust - With Basil, Cherry Tomatoes & Mozzarella


Pizza crust

Gooey, stringy cheese melting on a crisp thin crust warm from the oven.  Flavorful home-made tomato sauce and fresh basil.  As fresh as it can be, home-made pizza!  I have ended up baking pizza 3 times last month as I love feeding people the made from-scratch-ones. Surprisingly I had not made pizza for my family though I have been making them since quite some time.  So recently it was a jalapeno flecked one for my father who loves his food hot. And then again for my sister for whom making pizza at home was an  intimidating thought. Of course I had to show her that it was not!

When I bake pizza at home, it often surprises people that the crust can be good too.  More reasons for me to try out more recipes! My favorites are Peter Reinhart's amazing crust when I can plan well ahead. Cold flour, cold water and a really slow rise in the fridge. The really quick No-Knead Pizza when I need pizza in a hurry.  Just dump all ingredients in a bowl, give 20 energetic stokes and pat the dough right on the pan. Pizza from inspiration to the table in 1 hour! And now Pioneer Woman's pizza crust for times when I have just enough time and energy to stir the dough and dump it in the fridge. Refrigerate and use it over the next 3 days.  Just the dough for times like super busy weekdays followed by your child's birthday party over the weekend.

I like a crust which tastes good, bakes up thin, crisp and crunchy. And Ree Drummond's easy recipe gives you just that. Her pizzas feature this crust often, so we can safely assume it is a favorite. Indeed, when you have a good crust, the toppings are only limited to your imagination! Grilled Eggplant, Tomato and Basil or Three Cheese or  Pesto and Grilled Vegetables or Harissa, Roasted peppers and Cheese - well, just about anything you fancy! A real pleasure for those who take the pains to bake at home. 


Pizza with basil, cherry tomatoes and mozzarella

Here is Ree's crust topped with with tomato sauce, garlicky cherry tomatoes, basil and mozzarella which is merely a suggestion. Please do have it your way!

PIONEER WOMAN'S EASY NO KNEAD PIZZA CRUST. Recipe here. The below proportions  make a quarter of the recipe on her site.

Ingredients: To make 2 thin 9'' crusts or one large pizza. Double to make 4 nine inch crusts. 

All purpose flour - 130 grams / 1 cup
Salt - slightly heaping 1/2 teaspoon 
Extra virgin olive oil - 20 ml / 4 teaspoons
Water, at room temperature - 90 ml (Take 100 ml minus 2 teaspoons)
Instant yeast - 1/4 teaspoon

 Make the dough
  • Grease your dough rising bucket lightly but thoroughly. You need one large enough to hold the dough when it doubles.
  • Whisk the salt and flour, keep aside. 
  • Take the water in a medium sized bowl. Add the yeast, stir to mix, add the oil next and mix. 
  • Tip in the flour. I used my Danish whisk to mix. You can stir with a wooden spoon or mix with your hands.
  • The dough will look like its crumbly at first, but it will come together fine as you mix. Do not add more water in a hurry. Better to err on the side of the dough being less sticky than making it too sticky or wet.
  • The dough when mixed will be slightly sticky (not wet), but not very much so. If its dry, add a teaspoon of water at a time.  Once mixed, gently rotate it for about 30 seconds to a minute in the same bowl to make it smooth. Lightly grease your hands if needed. The dough will feel very soft and not as sticky now. ( Will update pictures next time I make it)
  • Place the dough in a greased dough rising bucket, close the lid leaving it very slightly open. The dough will almost double in the fridge gradually.
Topping: I have used homemade pizza sauce, cherry tomatoes tossed in garlicky extra virgin olive oil, herbs, salt and pepper and basil. 

  • To make the pizza : Invert two 9'' round or square tins, grease well using a teaspoon of oil for each pan.  Do not skimp as this is important for a crisp crust and easy release of the pizza. 
  • Remove the dough from the fridge, it would have firmed up. Using a dough scraper divide it into 2 equal parts.  
  • Hold the dough in your stretch and pull gently. 
  • Then place it on the pan. Push the dough around gently and spread to make a thin circle or square. If the dough resists, go back to it after a couple of minutes and then spread. Try to keep the thickness uniform as much as possible. Patch any holes.
  • Let the dough rise at room temperature for about 30 minutes. The dough will be puffy. (Ree doesn't rest the dough, bakes straightaway) 
  • Start pre-heating the oven to 250 C (or higher if your own has a setting) 10 minutes after you pat the dough on the pan.
  • After 30 minutes, top the puffed up crust with slightly thickly sliced vegetables of your choice. Cherry tomatoes cut side up here.
  • Bake the pizza for 13-15 minutes or till the crust is a dark golden at the edges. The time may vary depending on the oven. Watch carefully as the pizza will burn quickly at this temperature. If you lift the pizza the bottom should look golden and crisp. If it is not done yet, put it back for a minute or two more.  
  • Carefully remove the pizza (still on the pan) from the oven. 
  • Do not turn the oven off. Maintain the temperature at 250 C. 
  • Spread tomato sauce evenly. Top generously with grated mozzarella and fresh basil leaves. 
  • Bake for 2 more minutes or till the cheese melts.  Careful again as the cheese tends to turn hard if over baked. 
  • Remove from the oven. Let the cheese set for a minute. Slice with a pizza cutter and serve immediately. 
  • Of course within that one minute you will put the next pizza to bake! 
  • The first pizza will tell you if its baked long enough. If it is not crisp enough, bake the next one a minute or two more before you top with cheese. 
pioneer womans easy pizza crust

Please note : Ree uses lukewarm water for the dough, recommends using the dough after at least 24 hours in the fridge. She bakes the pizza soon after spreading it on the pan, I let it rise for 1/2 an hour. 

If your oven sets at a higher temperature, your pizza will bake faster. 

I find Amul mozzarella much better than other brands, though its been a bit inconsistent in quality a couple of times (like the cheese here). I prefer to bake the cheese for just 2 or 3 minutes at most as I find it turns rubbery when baked longer. 

Different crusts for different pizza emergencies . You can never have enough in your repertoire, can you? Which is your favorite crust?

Friday, September 26, 2014

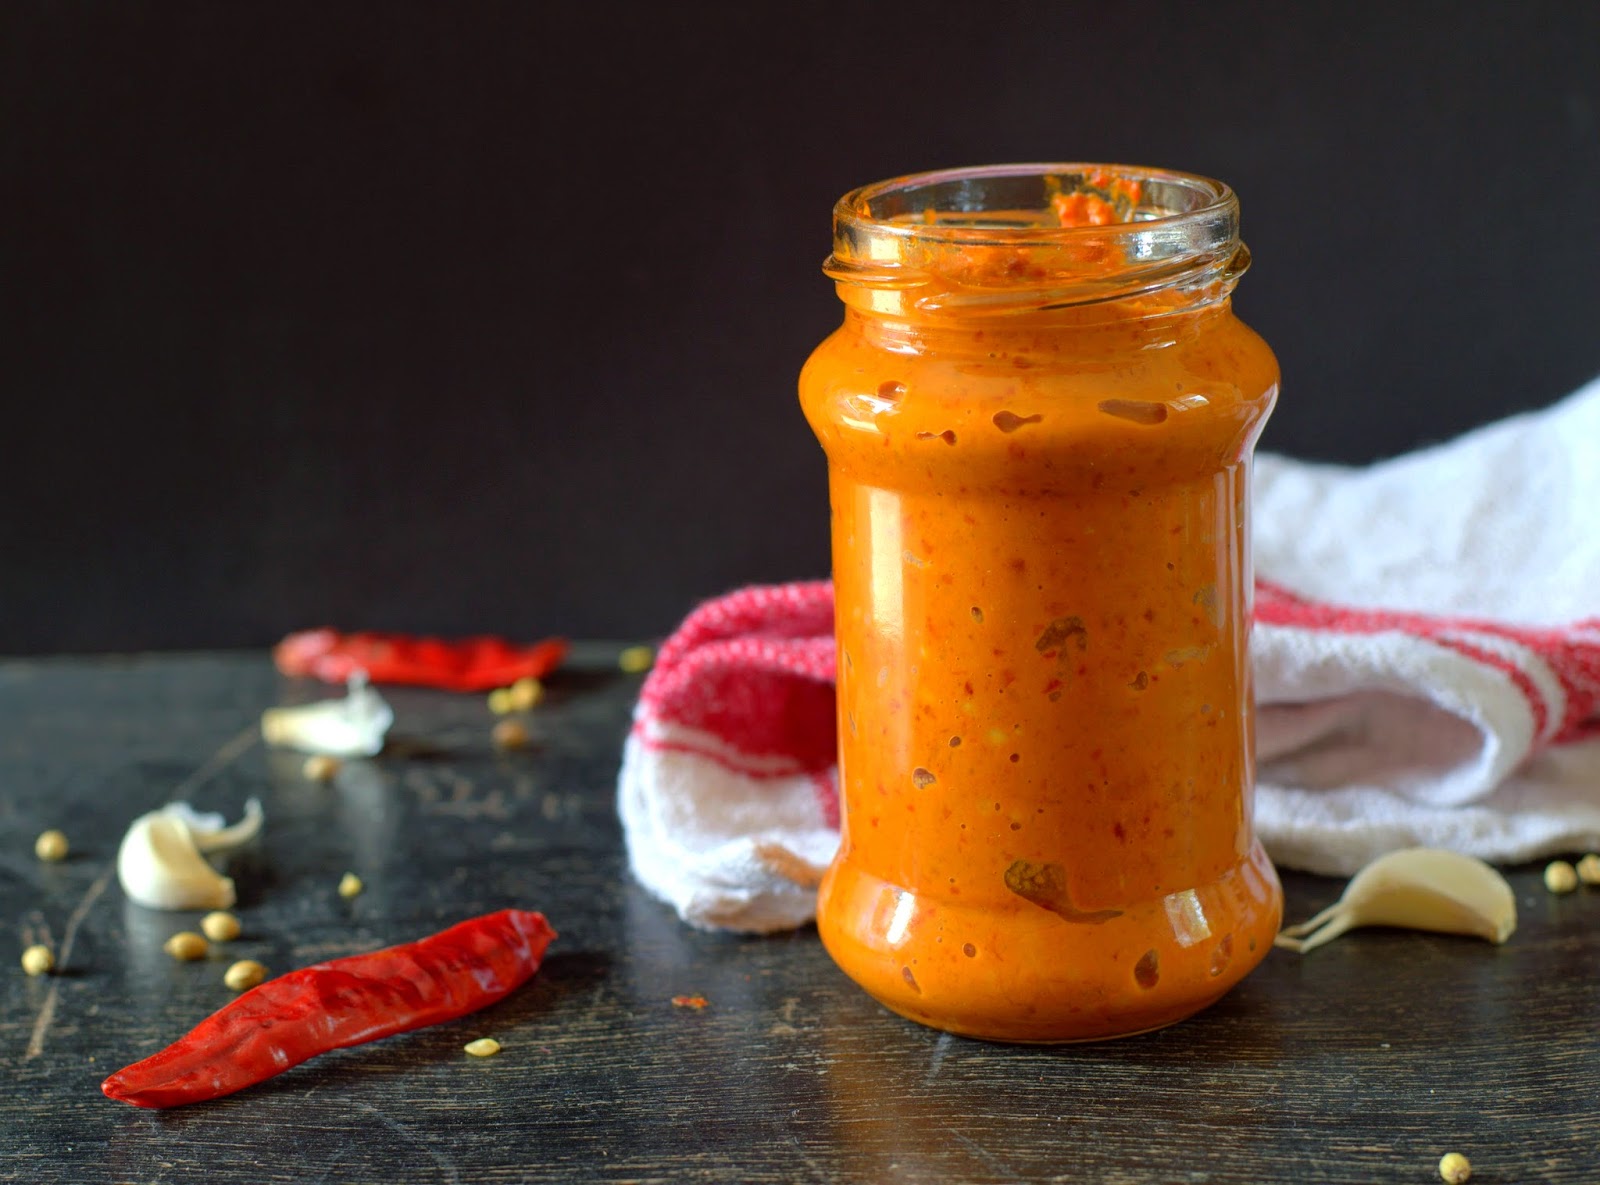
Red Harissa - Fiery Versatile Goodness In A Jar!


Red Harissa fiery versatile goodness in a jar


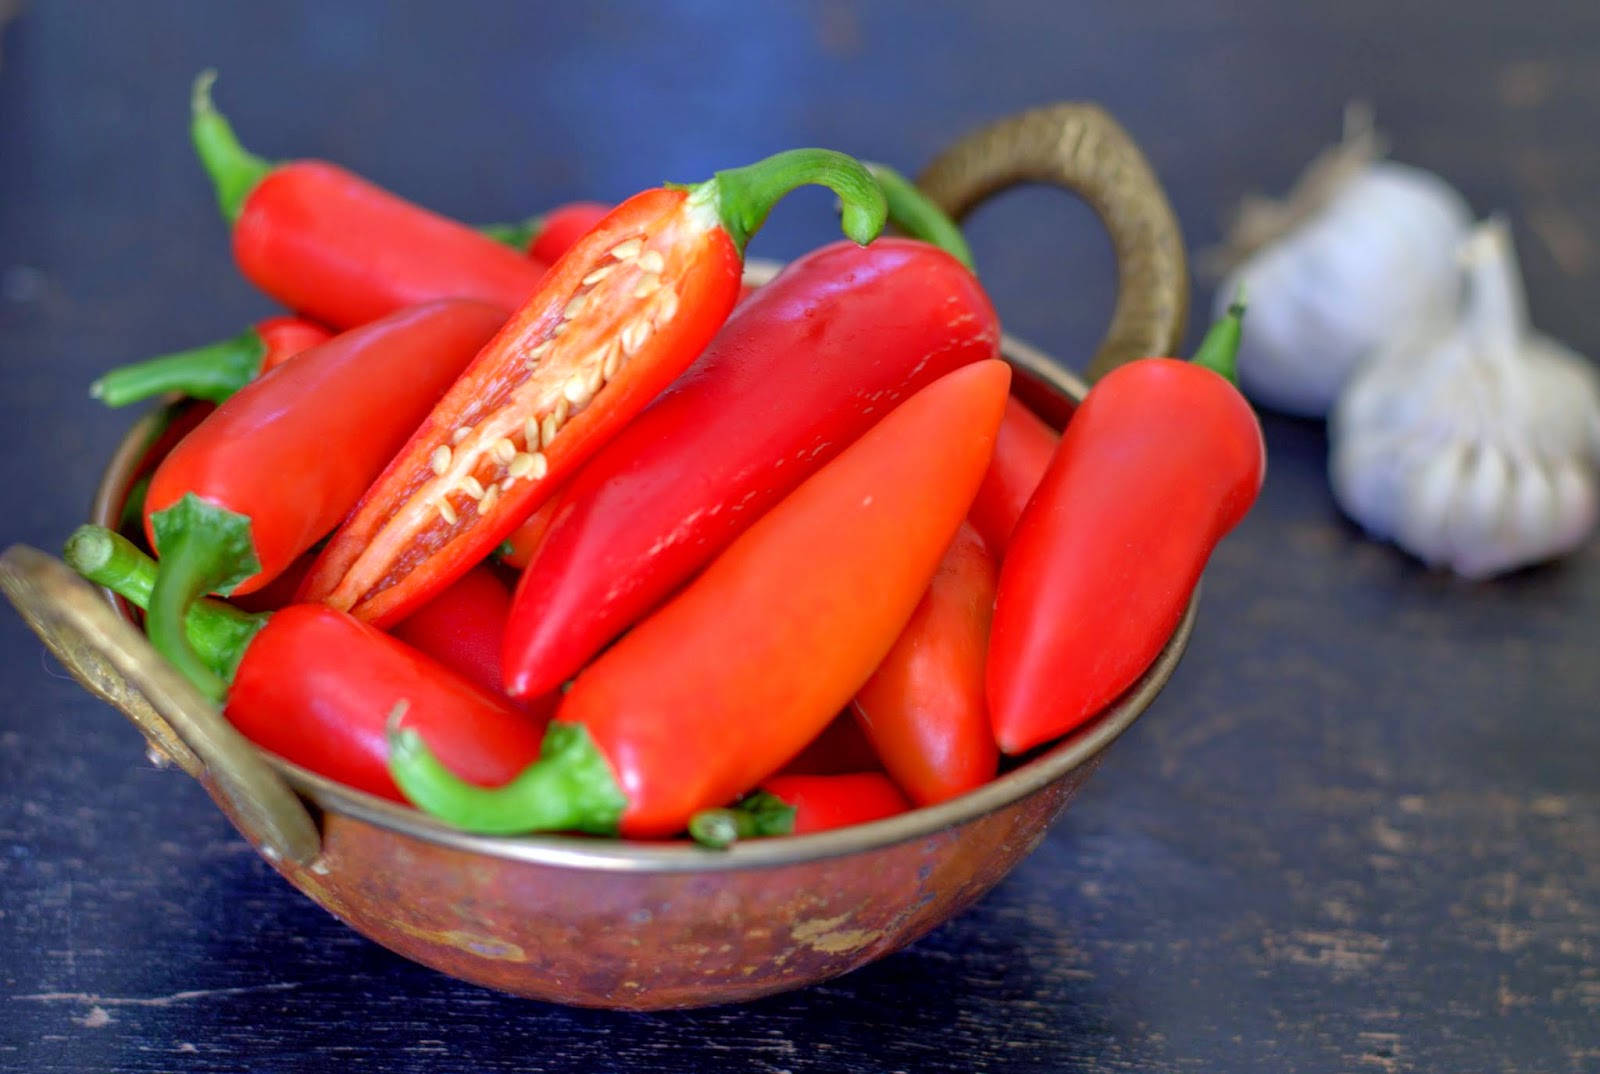
I am one of those people who hit the supermarket or vegetable market when I can think of nothing else to do. Gives me a chance to pick up some staples while I browse through the shelves for anything new. And when I find these 'finds' once in a while it pleases me no end! Spotted these red chilies at Namdharis a few days ago . Vibrant, gorgeous stuff that makes spice accustomed, heat craving palates dream of all the things you can dish up with these. Pickles, sauces and dips on my mind as the salivary glands work overtime! 

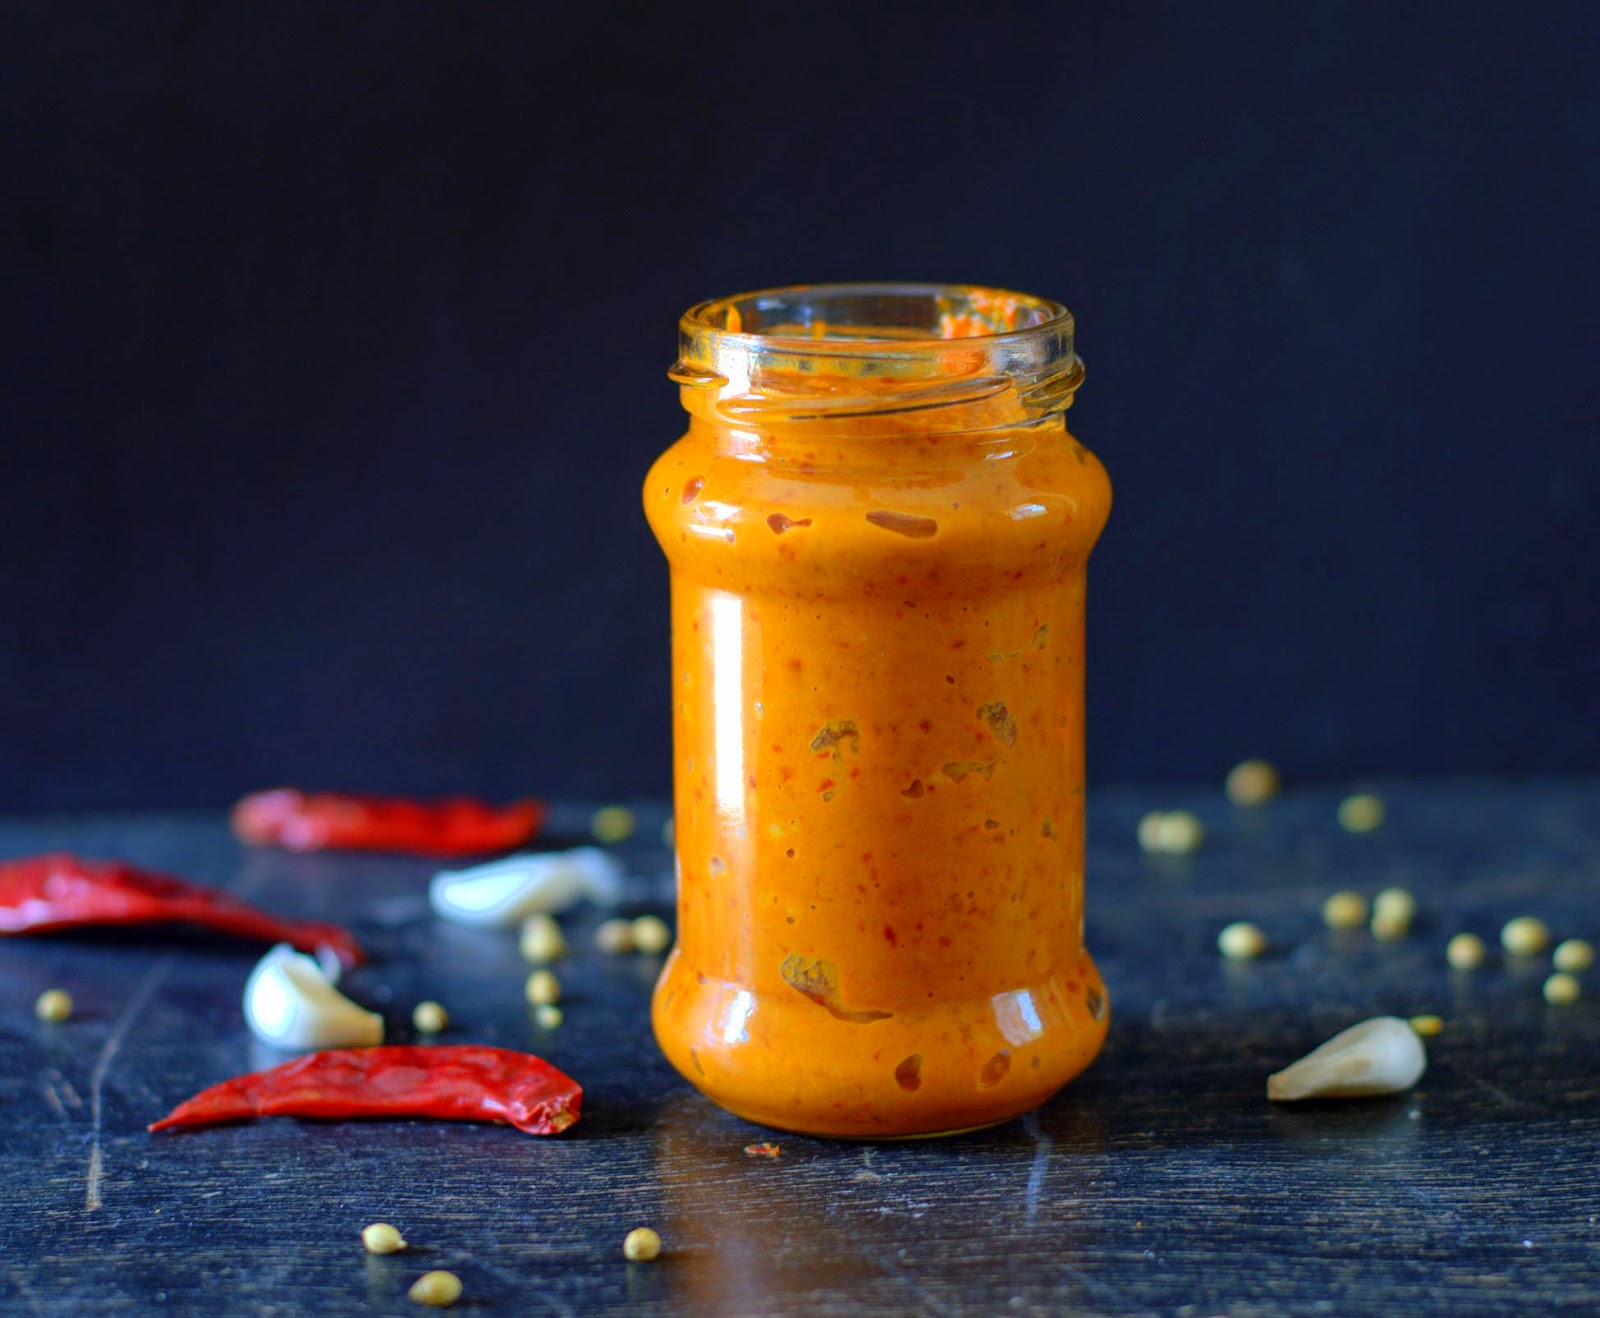
And then it was time for some Red Harissa! This popular hot pepper paste is known for its versatile use in North African cuisine. Most often made of a variety of red chilies, garlic, spices and oil, this paste is used for marinating meat and vegetables, in soups and even as a spread on pizza or sandwiches for the more adventurous. Want some extra zing in your savory dishes? Stir in a big dollop or a tiny spoonful or harissa!  


Harissa is really simple to make and can be easily tweaked to suit your heat and taste preference. Recipes suggest using different varieties of dried red chilies, red jalapenos and roasted red peppers. You could alter the amount of dried and fresh chilies or simply use roasted bell peppers for a milder harissa. Fresh or dried herbs like mint and coriander, spices such as cumin, coriander, paprika, lime or lemon juice or sun dried tomatoes can be added. The paste can be refrigerated for a couple of weeks with a layer of oil on top. 

red chilies for my harissa


Here is how I made it. Please feel free to alter the recipe to suit your taste. 

Recipe based on this recipe from The Kitchen

Ingredients: To make about 3/4 cup / 180 ml paste

Fresh red chilies / red jalapenos  - 50 grams
Dried red chilies, stemmed - 25 grams
Roasted red bell pepper, optional - 1/2 (about 50 grams)
Peeled garlic - 10 grams (about 20 small pods)
Roasted cumin powder - 1 1/4 teaspoon
Roasted coriander powder - 1/2 teaspoon
Salt - 1 1/4 teaspoon
Fresh coriander leaves - 1/4 cup, loosely packed
Extra virgin olive oil - 3 tablespoons

Method : Soak the dried chilies in hot water for about half an hour. Roast the red bell pepper in a 200 C oven for about 20-25 minutes or till blistered and slightly charred. Once roasted peel the skin and chop roughly.

Drain the soaked chilies, cut them into two. As you cut, be sure to drain any water which may have seeped in.

Chop the fresh chilies into rough pieces. Take all ingredients except the oil in  your blender . Process till smooth. Add the oil and process again. Carefully check the seasoning. 

Transfer to a clean dry jar, top with more oil and refrigerate till needed.

red harissa


  • Please note : Though the paste is quite hot especially when freshly ground, you can expect your grilled vegetables to taste less fiery. So maybe I will add a dash of red chili powder while grinding the paste if I will be using the paste in a marinade. 
  • Unless you want to eat it off the jar or on your toast or pizza , it may be a good idea to make it more intense as the flavors will be less assertive once the paste goes into a marinade or tossed into some noodles. The flavors though mature overnight.
  • Be sure to wear gloves if you use contact lenses or have a little one around.
  • De-seed the chilies and pepper for less heat. I have retained all the seeds.
  • You can also add some tomato paste for tang and less heat.
  • I added roasted bell pepper for the first jar. I forgot the it the next time, but liked the paste better without it.


I made some Paneer Tikka using harissa in the marinade and it was delicious!  I see myself making this paste often with varying flavors perhaps. With fresh red chilies available this time of the year, won't you make yourself some?


Wednesday, September 17, 2014

Orange Poppy Seed Financiers

financiers


For once, financiers I would like to talk about! Trust me, I wouldn't even mention yawn-inspiring folks in dreary grey business suits, but I must when the financiers here are delicious little French cookie-cakes. Apparently these were created by a pastry chef in France whose shop was near the Paris stock exchange. Rich, elegant cookie cakes made with ground almonds, egg whites and browned butter - just right for his wealthy discerning customers. Cakes made in small rectangular molds resembling bars of gold probably gave them the name financiers. These are similar to Australian friands which are normally baked in muffin tins or friand pans (they make pretty cakes!). These are made with melted butter and are often topped with fresh fruit. 

With some almond meal in the freezer threatening to go rancid, financiers had to happen! Decided on this recipe from David Lebovitz as it is less richer than most recipes I came across. A touch of baking powder here makes for lighter cakes. So with black poppy seeds and a generous amount of orange zest thrown in, Orange Poppy Seed Financiers were out of the oven in no time at all. I love recipes like this! Top them with fresh fruit or chocolate chips or drizzle some citrus glaze on the warm cakes, you will like them all! Crusty edges, moist nutty interiors, these tender cakes are delightful freshly baked. 

The batter is ridiculously easy to put together - a matter of whisking in melted butter and egg whites into flour, sugar and almonds. Conveniently, the batter  can be stored in the refrigerator for a couple of days. 


Recipe from hereIngredients : To make about 12-15 mini cakes. Double the recipe if using a larger muffin tray. 


Ground almonds - 28 grams
Sugar - 50 grams ( I used powdered sugar, sifted)
All-purpose flour - 22 grams
Baking powder - 1/8 tsp
Black poppy seeds - 2 teaspoons
Orange zest - Freshly grated from one large orange, Microplane Zester* is the best tool for this.
Pure vanilla extract - 1/2 teaspoon
Egg whites -  62 grams
Unsalted butter, melted and cooled slightly (please read note) - 42 grams


Method: 
1.  Preheat the oven to 375F (190C).  I used a black mini muffin tray, so baked at 180 C / 350 F.  Spray the tin with with baking spray or grease and flour lightly but thoroughly.  
2.   Sift together the sugar, ground almonds, baking powder, salt and flour into a medium sized bowl.  Whisk in the poppy seeds. 
3.  Using a small whisk, whisk together the egg whites,  vanilla , zest and melted butter to incorporate well.  Whisk the whites mixture into the almond mixture in 2-3 additions.  Whisk gently but thoroughly.  This step is important as otherwise the butter may not get mixed properly making the cakes greasy.  The batter will be thinnish and of pouring consistency.  If not using the batter immediately, you can store it in the fridge for 3 days.
4.  Fill each cavity of the muffin tray 3/4 full.  Rap the muffin tin  on the counter once or twice to release any air pockets and level the batter.  
5.  Bake for 10-12 minutes  or until the financiers  feel firm when gently pressed with a finger (I did a tooth pick test too)  
6. Cool completely, then remove from the tin.  Please do eat some as soon as they cool.  Can be stored airtight for a couple of days, but the crusts will soften.
friands

Please note :  I made 3 batches of these.  I used melted and cooled butter for one batch and melted and butter cooled slightly (about 125 F) for another batch wondering if that would make a difference.  I could not see a great deal of difference between the two . Either ways, the cakes taste great when really fresh. Only when they are kept for more than an hour or more, they taste a tiny bit too rich. Better to play safe, use butter cooled slightly,  serve the cakes fresh off the rack.
If you do have left over cakes, it may be a good idea to warm them for a 2-3 minutes at 180 C before serving. 
Variations : Omit the poppy seeds.  Use mini chocolate chips.  Do not stir the chips into the batter as they will sink and stick to the pan.  Top the batter with a few chips after you rap and bake.
Fresh fruit : If you like fresh fruit in your bakes, do absolutely use some. Most berries (not strawberries though), plums and cherries seem to work. 
Glaze : Make these plain with either orange or lime zest.  Drizzle some glaze over the cakes when they are still warm.
Am happy about this recipe as a start for me to get know these much loved cakes.  Looking forward to try more recipes and variations, fresh fruit, browned butter and more.  The things you need to do as a baker-blogger! 

Microplane Zester
Buy in India
Buy in the USA


Tuesday, September 9, 2014

Whole Wheat Almond Biscotti


whole wheat biscotti

Its been whole grains on my mind of late and I seem to be actually hoarding them! Amaranth flour thanks to Deeba, then some buckwheat flour, barley flour, sprouted finger millet flour, cornmeal and of course good old wheat flour. I made a stash of ragi malt with plenty more whole grains and nuts thrown in. Sweetened with jaggery or sugar, flavored with cardamom, I love sipping on some any time of the day! It goes to hubby's office in a flask for the late evening hunger pangs, the ever hungry pre-teen son manages to gulp down a glass now and then. The fussy daughter however still wrinkles her little nose, sigh! 

Whole wheat crepes, granola, granola bars, whole wheat almond biscotti and more have been appearing more often! I hope this isn't a passing phase and I stay inspired to include more of these grains in our meals. Its an acquired taste alright, but we should get there. Lots to experiment with, you will hopefully see more healthier baking here. Oh no, I never said I will forget all the sinful desserts and bakes, did I? 

Stumbled upon this recipe for biscotti made with whole wheat, almond meal and less sugar than usual. Without added fat, these are crunchy but not very hard. The log slices really well, making for thin biscotti. Slightly coarse textured, just about sweet (think Marie biscuits), these will be good cookies for the health conscious. If making these for kids, you may need to step up on the sugar by a tablespoon or more, add the mandatory chocolate chips or whatever catches their fancy. I have flavored the biscotti with Chai masala and orange zest, which is just a suggestion, cinnamon, cardamom or plain vanilla will be great too! 

whole wheat biscotti


Whole Wheat Almond Biscotti - Recipe from New York Times

Ingredients: To make about 15-18 thin biscotti .
Whole wheat flour - 125 grams
Almond meal - 30 grams
Baking powder - 1/2 teaspoon
Chai masala - 1 1/4 teaspoon
Brown sugar - 62 grams / 1/3 cup packed
Vanilla extract - 1/2 teaspoon
Eggs - 72 grams / 1 1/2 eggs
Orange zest, fresh from one orange. 
Almonds - 50 grams toasted and chopped ( I have used almond flakes)
  • Method : Pre-heat oven to 150 degrees C / 300 F. Line a baking tray ( I used a 10x12) with parchment. 
  • Sift together the flours, baking powder, salt and chai masala. Zest the orange. I love my Microplane Zester* for this!Take the eggs, sugar, orange zest and vanilla in a medium sized bowl. Using a hand mixer, beat for the mixture for about 2 minutes on speed 3. The mixture will be thick. 
  • Fold in the flour mixture, stir in the almonds. The dough will be sticky, may be a little less sticky and a little more firmer than the normal biscotti dough. 
  • Scrape the mixture in the middle of the lined pan. With wet hands shape the dough into a log. I made mine about 9'' x 2'', about an inch high. If doubling the recipe, make two logs side by side, with at least 2 inches space between them and two inches around the logs. 
  • Bake for about 35-40 minutes or till firm to the touch. The logs will spread but not a lot. Cool for 20 minutes or more if it suits your convenience.
  • Place the log on the kitchen counter or dry cutting board. Slice on the diagonal into thin slices. 
  • Arrange them on the baking sheet cut side down. (These are too thin to stand them up). Bake 10-12 minutes on each side. Bake longer for extra crunchy biscotti.
  • Cool and store in an airtight container. 
  • Please note : Use unrefined sugar or organic brown sugar in you wish, I have not tried these yet. Omit the chopped almonds in the dough if you want to cut down the calories further. 

biscotti

If you like having these twice baked cookies around, you may want to play around with this recipe! 


Please note:*This psot contains affiliate links. This means if you click on the link and buy through the link, I will earn a tiny commission on the same. I recommend products which I have used and found good.You will be paying the same price as mentioned on the website, there will not be any variation here. This commission will help me with me costs of running the blog and channel. Your support will be greatly appreciated.